Archive | February, 2011

Black and White

23 Feb

There are a couple of ways of converting a photo to black and white on photoshop. You can:

  • Black and white converter
  • Desaturate- however, this creates a flat image
  • Channel mixer is the preferrable way as you can mix the RGB channels to either brighten or darken in different areas.

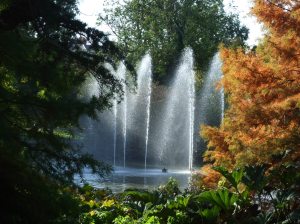
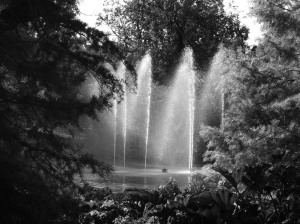
I used the channel mixer to change it to Monochrome and then altered the RGB channels- increasing the red to bring out the right hand tree, and decreasing the blue to increase the contrast in the water jets.

The next thing to do was to to Dodge and Burn the highlights, midtones and shadows. Dodging adds white, and burning adds black.

Editing Landscapes in Photoshop

22 Feb

Photoshop is a great tool for bringing out the best in a photo.

Normally we can experiment with different additions to the photo by adding layers. These do not alter the original image and so you can work on them at a later date if need be.

Curves– these alter the individual pixels in the photo by making them brighter of darker. By adding a layer and opening the curves box, you can edit the different tones- blacks, shadows, midtones, highlights and whites. This will alter the whole feel of the photo by bringing out and enhancing shadows, clouds and textures to change the mood of the photo. You can also edit the RGB content individually. If there is too many yellow tones, we can add blue to contrast, too much green we add magenta, and too much red we add cyan.

Lassoo– this allows us to select a particular area of the photo to edit without altering the other parts and ruining the image.

Feathering-this softens the edge of the area you have selected to edit, making blending easier.

Straightening the Horizon- this tool enables you to make your image fit more neatly into the rule of thirds.

Hue slider– adjusts all colours in the image- shadows, midtones and highlights. Useful when you want a weird or surreal effect.

Saturation slider– will increase or decrease the amount of colour the image contains.

Colorize- adjusts all the colours to a single tone.

Colour Balance– This will only control the colours in that tone, and again midtones, shadows and highlights. We can affect the tone of the picture- perhaps giving it a vintage feel, or cold looking perhaps.
Landscapes

22 Feb

Landscapes usually follow the same rules as portraits:

  • The rule of thirds- The eye reads from left to right in a picture (in Westernised countries) , and the way you contruct a landscape should bear this in mind. The strongest area to place a focal point is in the bottom right hand area- you have had a chance to look at the rest of the photo and digest the information, whereas if you were to place the focal point in the upper left hand corner, you immediately look at the object/ place/ thing and at nothing else.
  • Leading lines– these are used to draw the eye into the picture, and even lead you around the picture. Very useful when there is a lot of information in the photo.
  • Times of the day have different types of light– In the early hours of the morning, the light will be weak, containing mainly muted colours, and casting few shadows. This gives a very moody spin on the picture. At midday, when the sun is at it’s highest, colours are vivid, photos will lack depth due to light being dispersed everywhere, although this can be remedied if it iis an overcast day. Sunset light gives a rich colour palette, and long shadows provoking lots of emotions. The Golden Hour is the first and last hours of sunlight in a day, where the colours will be soft.
  • Equipment you may need– camera, tripod for long exposures, UV filters for sunny days, wide lens for larger amounts of data to be fitted inside the frame.

Settings

  • f2.8 to f5.6 will isolate a subject
  • f16 to f22 will capture more information on a larger scene
  • Correct white balance will adjust the tone of the whites in your photo to the correct level. For example, on an overcast day, the white colour may turn out blue, so if you change the setting to cloudy, the camera will correct this by adding yellow hues.
  • ISO is how sensitive yiur camera is to the light. A high ISO of 800+ will add noise to the photo. It is better to use a lower ISO and decrease the shutter speed to allow the image to develop fully. This is preferable for landscape pictures as the subject will not be moving around so much, unlike in portraits. We can tell if a photo will over or under expose by looking at the Histogram built into the camera. There should be a nice even spread on the graph. Too high to the left indicates overexposure and too high on the right indicates underexposure. This can be corrected by altering the exposure.
  • Bracketing– when we aren’t sure of the ISO we need to use, this function will take 3 photos at varying f stops.